
Installation Guide
This guide covers installing Sprint 0.2.1 from Obsidian Community plugins and creating or reconnecting a Sprint workspace.
Requirements
- Obsidian 1.13.0 or later
- The Obsidian Bases core plugin enabled
- Community plugins enabled for the vault
New Installation
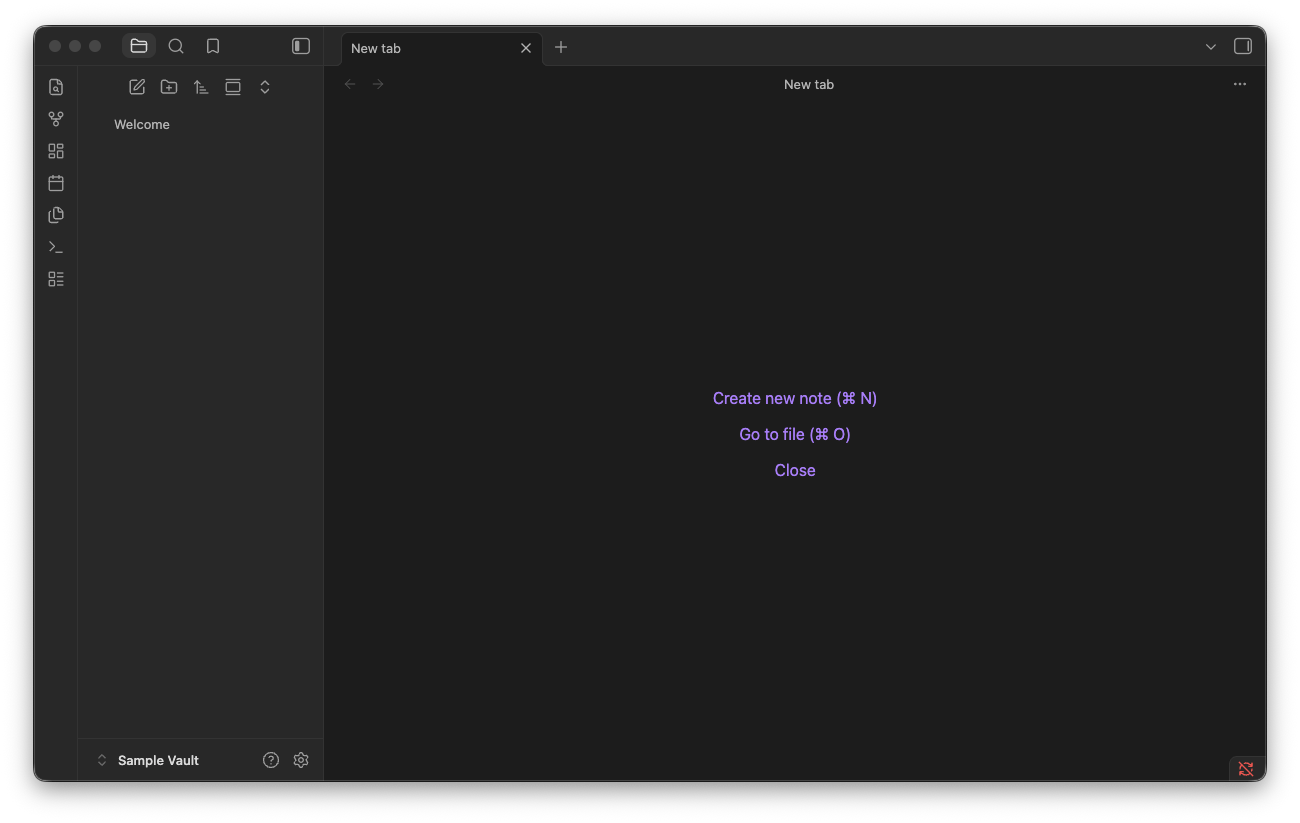
Open the vault where you want to use Sprint. Select the settings icon in the lower-left corner.
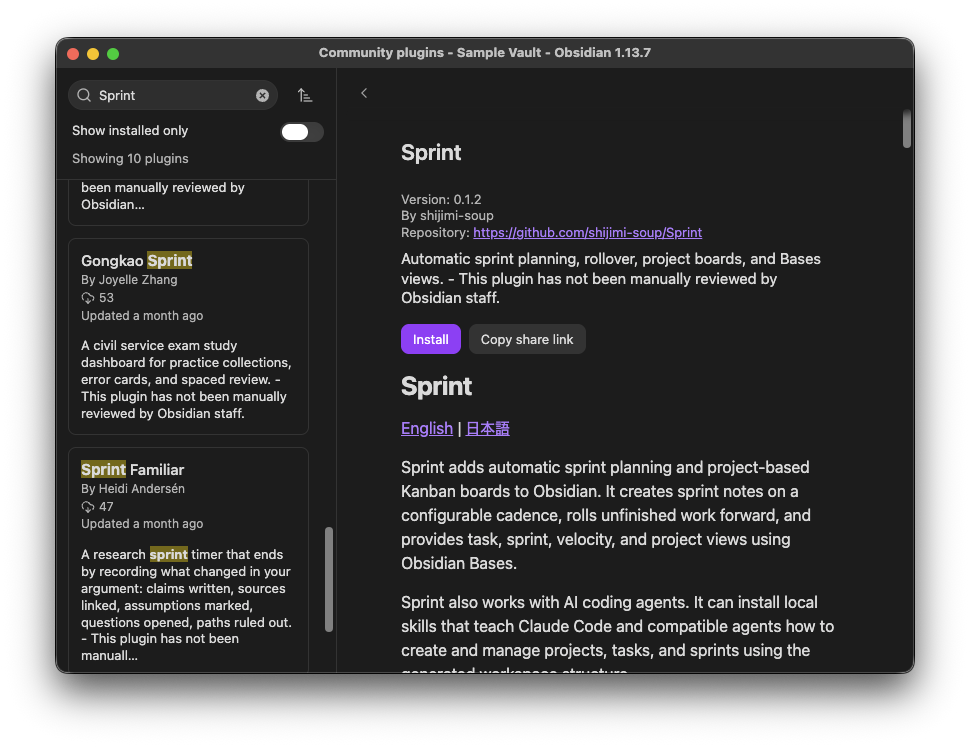
Open Community plugins, select Browse, and search for Sprint. Choose the plugin published by shijimi-soup, then select Install.
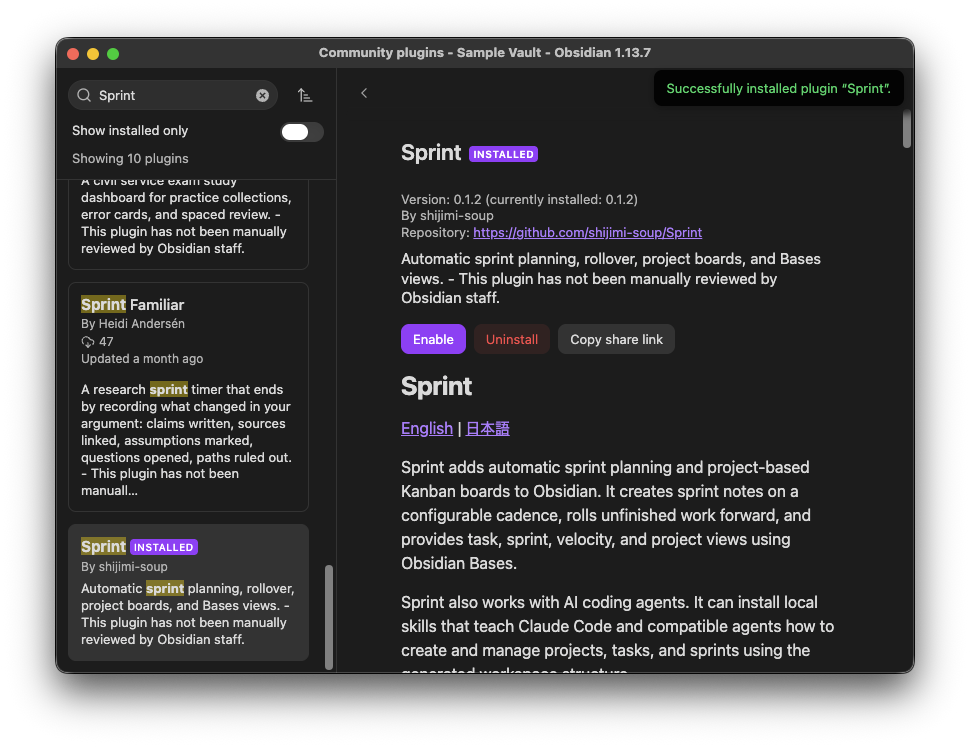
After installation finishes, select Enable.
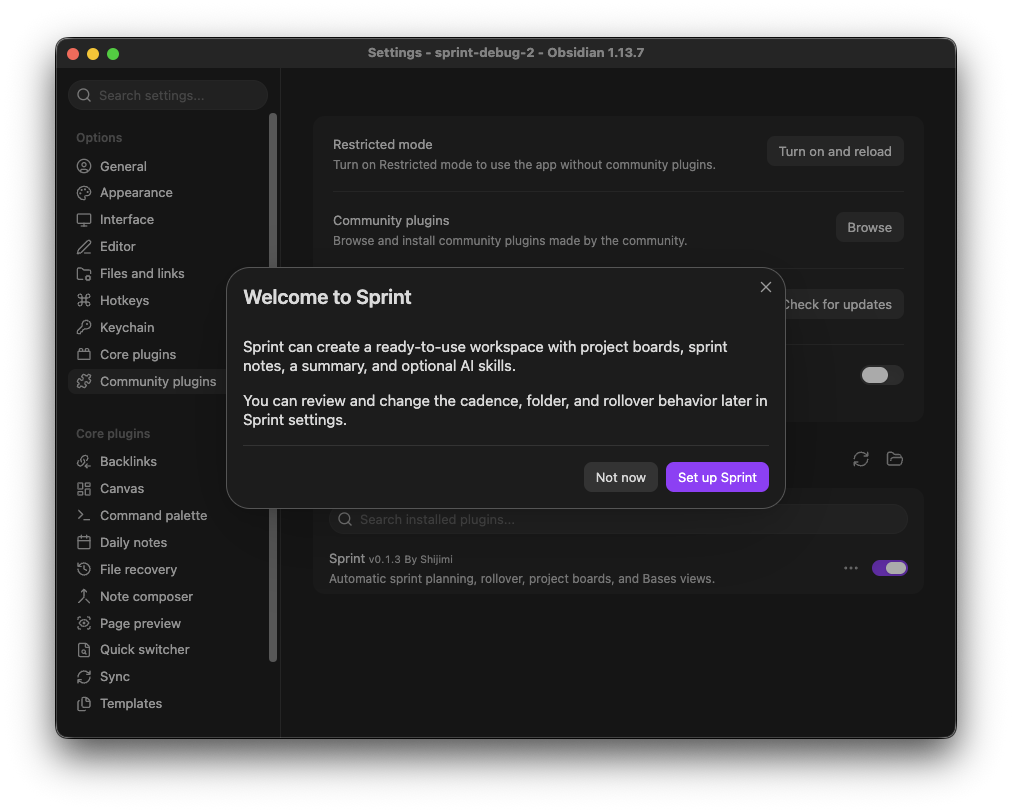
Sprint opens the welcome prompt. Select Set up Sprint.
Review the folder, cadence, and future-sprint count. Select Create workspace to enable automatic synchronization and create the files.
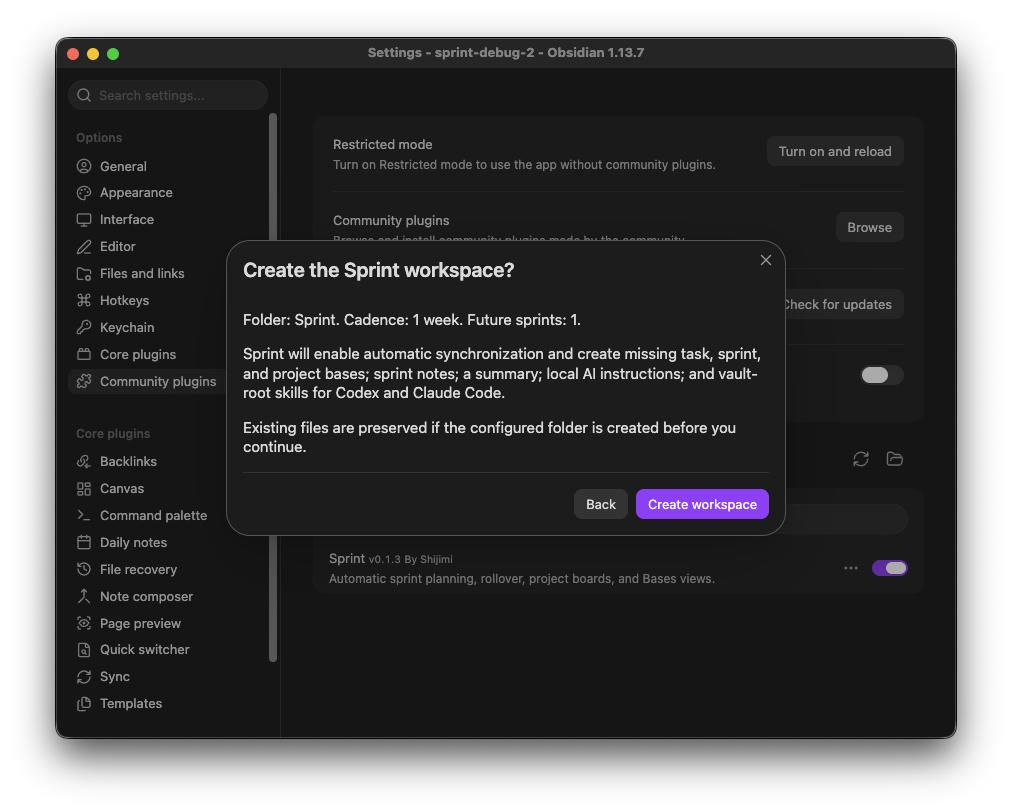
Select Not now if you do not want Sprint to create files. You can reopen this prompt later from Settings -> Sprint -> Setup guide.
Check The Workspace
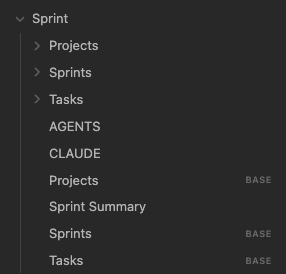
After setup, the default Sprint folder contains the task, sprint, and project folders; three Bases files; local AI instructions; and Sprint Summary.md.
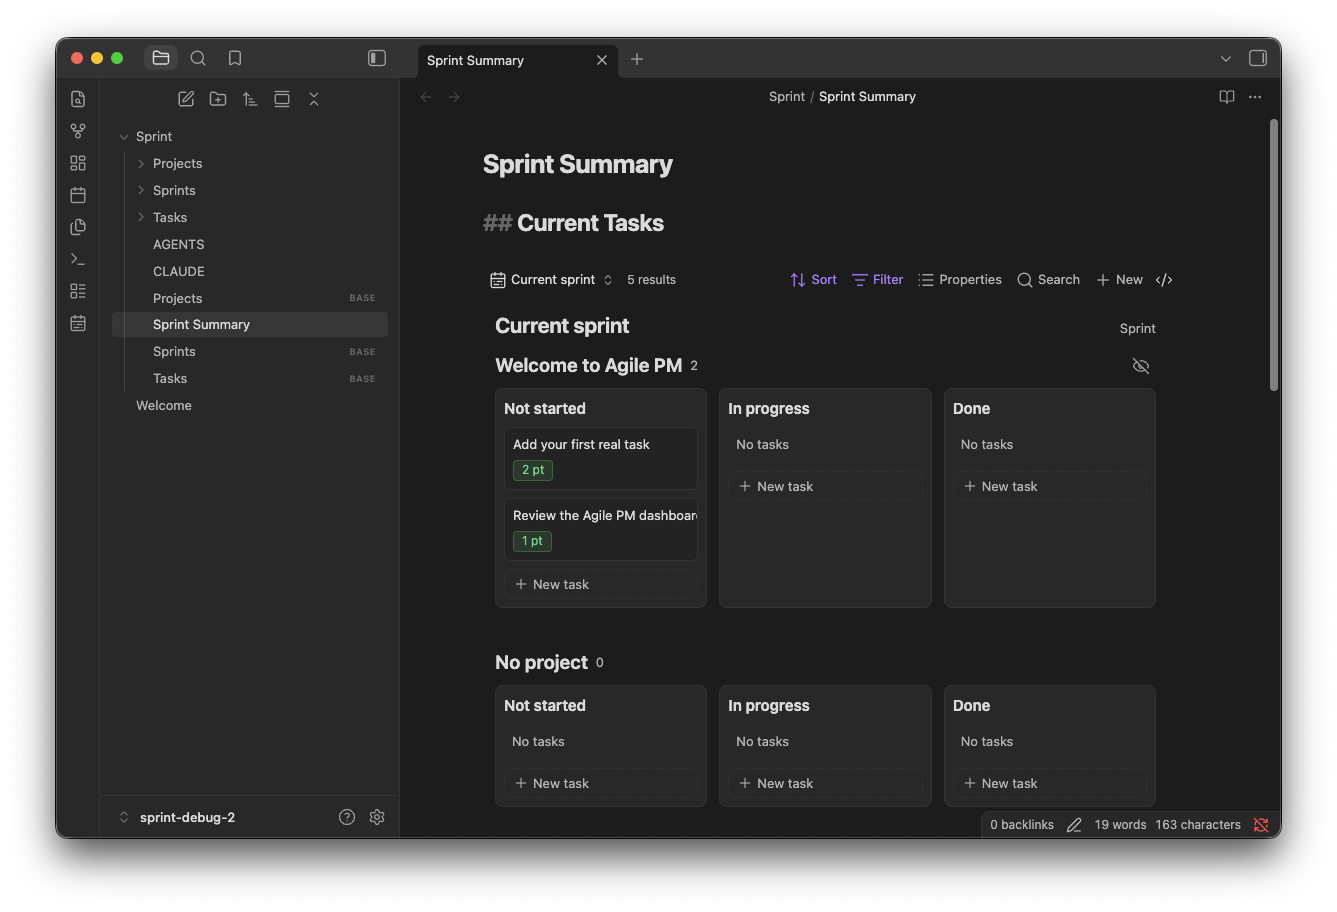
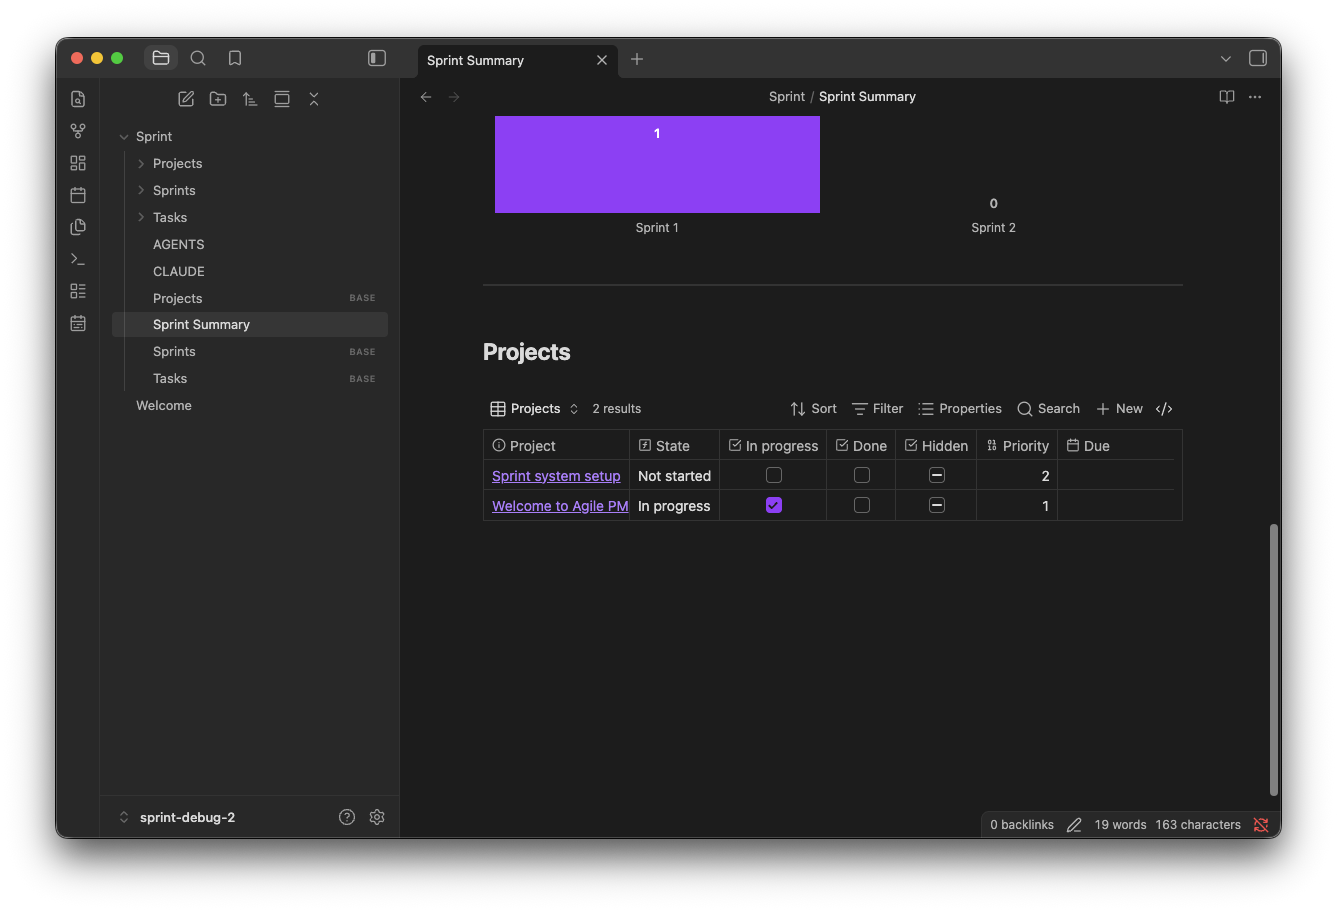
Open Sprint/Sprint Summary.md, or run Open Sprint Summary from the command palette. The first section shows current-sprint tasks grouped by project and state.
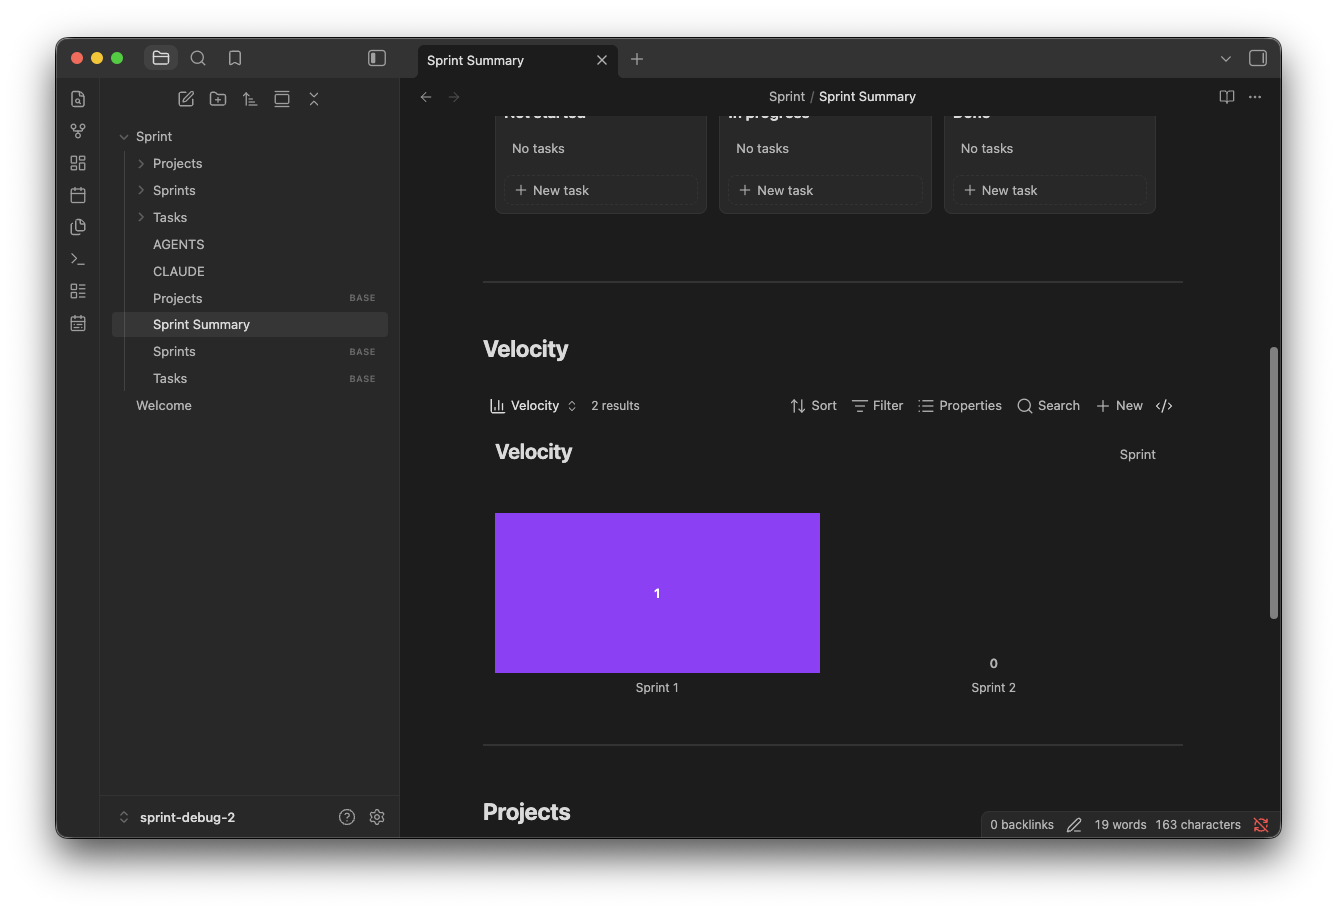
Scroll down to see completed story points in the Velocity chart and manage projects in the Projects table.
Existing Sprint Workspace
If the configured Sprint folder already exists but the plugin has no saved settings, the welcome prompt offers Use workspace instead of creating a new one.
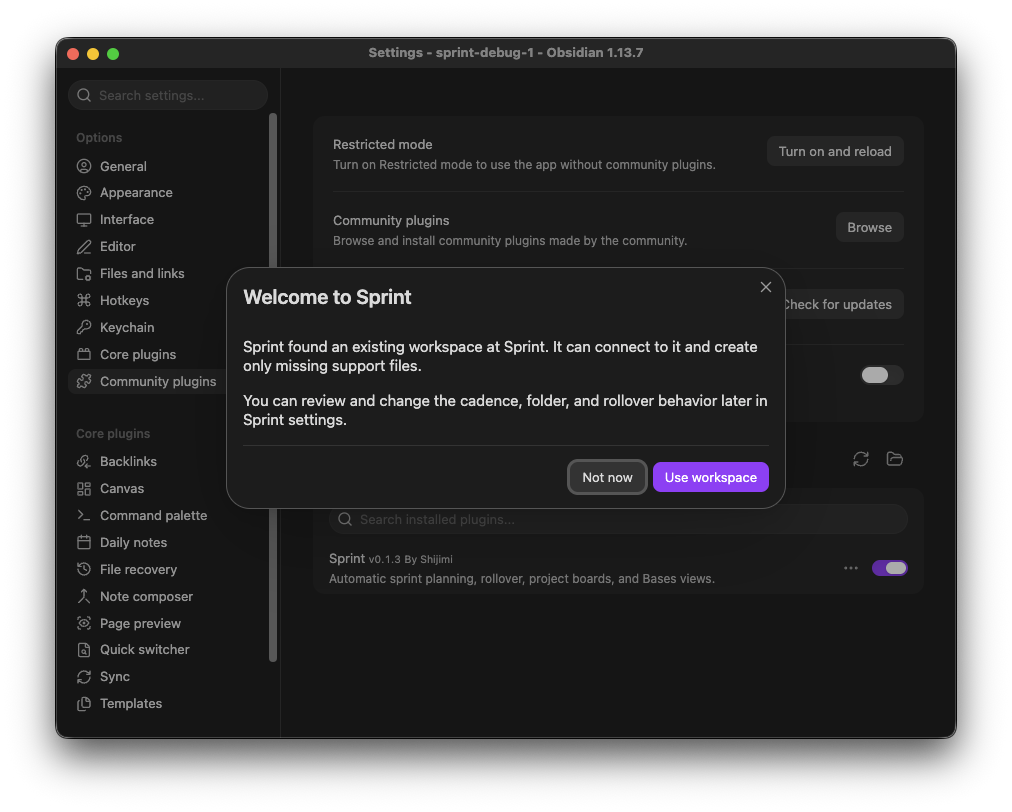
Review the detected folder and select Use workspace. Sprint creates only missing support files and sprint notes. Existing content is preserved, and tutorial projects and tasks are not recreated.
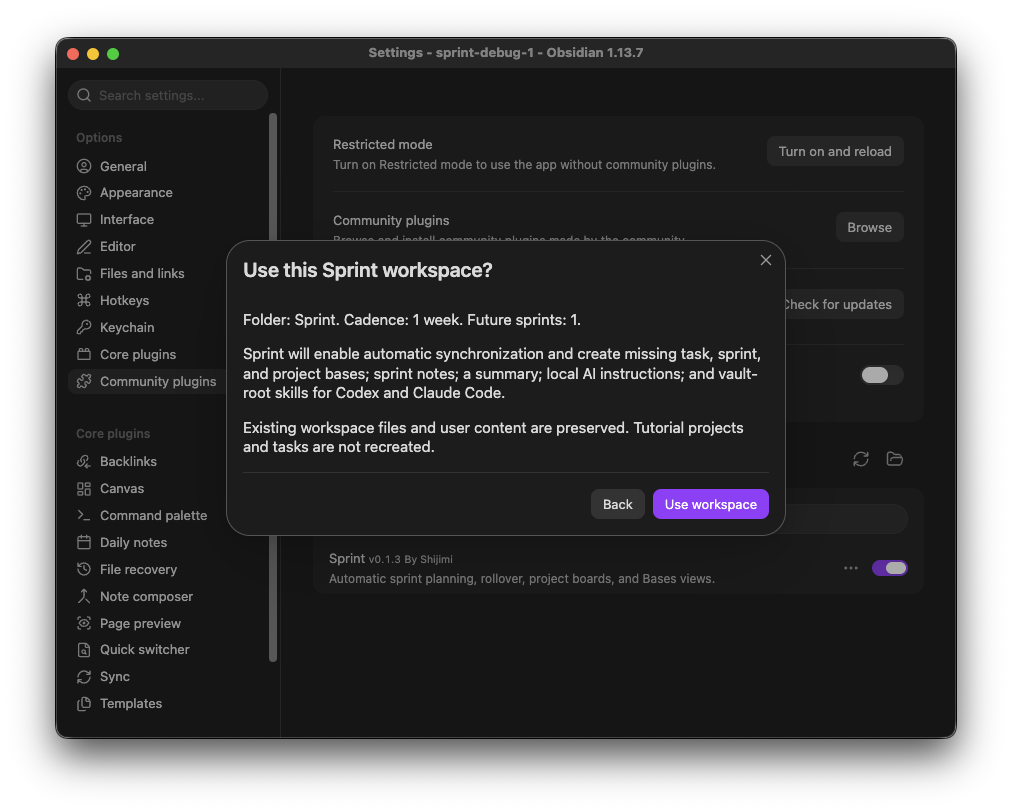
Reinstalling or updating Sprint does not reset sprint numbering or overwrite the existing workspace. The separate Reset workspace setting is destructive and requires explicit confirmation.
Files Created
The default workspace structure is:
Vault root/
├── .agents/skills/sprint/SKILL.md
├── .claude/skills/sprint/SKILL.md
└── Sprint/
    ├── Tasks.base
    ├── Sprints.base
    ├── Projects.base
    ├── Projects/
    ├── Tasks/
    ├── Sprints/
    ├── AGENTS.md
    ├── CLAUDE.md
    └── Sprint Summary.md
Manual Installation
If Sprint is unavailable in the Community plugins browser:
- Open the latest Sprint release.
- Download
main.js,manifest.json, andstyles.cssfrom Assets. Do not use the source-code archives. - Create
<vault>/.obsidian/plugins/sprint/and place all three files directly inside it. - Restart Obsidian, or run Reload app without saving from the command palette.
- Open Settings -> Community plugins and enable Sprint.
- Follow the welcome prompt to create or reconnect the workspace.
Troubleshooting
- The welcome prompt does not appear: Open Settings -> Sprint -> Setup guide.
- No workspace files appear: Open Settings -> Sprint and make sure Automatic sprints is enabled.
- The board does not render: Open Settings -> Core plugins and enable Bases.
- Sprint does not appear after manual installation: Confirm that
main.js,manifest.json, andstyles.cssare directly inside.obsidian/plugins/sprint/, then reload Obsidian.